-
Indholdsfortegnelse
Introduktion
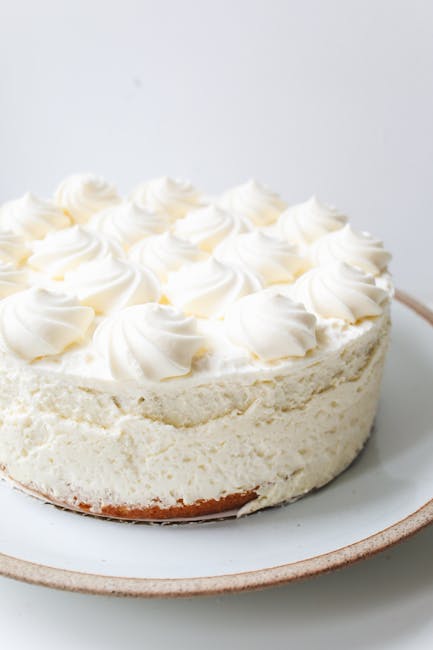
Philadelphia cheesecake is a classic dessert that has captured the hearts and taste buds of many. Originating from the United States, this rich and creamy cheesecake is known for its smooth texture and delightful flavor, primarily due to the use of Philadelphia cream cheese. The history of cheesecake dates back to ancient Greece, but the modern version we enjoy today has evolved significantly over the years. The Philadelphia cheesecake, in particular, gained popularity in the 20th century, thanks in part to the marketing of Philadelphia cream cheese, which became synonymous with this dessert. This article will guide you through a comprehensive recipe for making a traditional Philadelphia cheesecake, along with tips, variations, and serving suggestions.
Tid
- Forberedelsestid: 20 minutter
- Tilberedningstid: 60 minutter
- Køletid: 4 timer (eller natten over)
Ingredienser
To make a classic Philadelphia cheesecake, you will need the following ingredients:
- Til skorpen:
- 1 ½ kop grahamskiks-krummer
- ½ kop granuleret sukker
- ½ kop usaltet smør, smeltet
- 1 teaspoon ground cinnamon (optional)
- For the filling:
- 4 (8-ounce) packages of Philadelphia cream cheese, softened
- 1 kop granuleret sukker
- 1 teskefuld vaniljeekstrakt
- 4 store æg
- 1 kop creme fraiche
- ¼ kop mel til alle formål
- 1 tablespoon lemon juice (optional)
Trin-for-trin instruktioner
Follow these detailed steps to create your Philadelphia cheesecake:
- Forbered skorpen: In a medium bowl, combine the graham cracker crumbs, granulated sugar, melted butter, and ground cinnamon (if using). Mix until the crumbs are evenly coated with butter.
- Form the crust: Press the crumb mixture firmly into the bottom of a 9-inch springform pan. Use the back of a measuring cup or your fingers to create an even layer. Bake in a preheated oven at 350°F (175°C) for 10 minutes. Remove from the oven and let it cool.
- Make the filling: In a large mixing bowl, beat the softened cream cheese with an electric mixer on medium speed until smooth and creamy, about 2-3 minutes.
- Add sugar and vanilla: Gradually add the granulated sugar and vanilla extract to the cream cheese, mixing until well combined.
- Incorporate eggs: Add the eggs one at a time, mixing on low speed after each addition until just combined. Be careful not to overmix, as this can introduce air into the batter, leading to cracks.
- Add sour cream and flour: Gently fold in the sour cream, flour, and lemon juice (if using) until just combined. The batter should be smooth and creamy.
- Hæld fyldet på: Pour the cheesecake filling over the cooled crust in the springform pan, smoothing the top with a spatula.
- Bag cheesecaken: Bake in the preheated oven at 325°F (160°C) for 60 minutes, or until the edges are set and the center is slightly jiggly. Turn off the oven and leave the cheesecake inside for an additional hour to cool gradually.
- Sæt cheesecaken på køl: After cooling, remove the cheesecake from the oven and let it cool to room temperature. Once cooled, cover it with plastic wrap and refrigerate for at least 4 hours, or overnight for best results.
- Servering: Once chilled, carefully remove the sides of the springform pan. Slice the cheesecake and serve as desired.
Tips til madlavning
Here are some expert tips to ensure your Philadelphia cheesecake turns out perfectly:
- Ingredienser ved stuetemperatur: Make sure all your ingredients, especially the cream cheese and eggs, are at room temperature. This helps create a smooth batter and prevents lumps.
- Lad være med at overblande: Overmixing can incorporate too much air into the batter, leading to cracks during baking. Mix just until combined.
- Vandbadsmetoden: For an even creamier texture and to prevent cracks, consider baking your cheesecake in a water bath. Wrap the springform pan in aluminum foil and place it in a larger baking dish filled with hot water.
- Cooling process: Allowing the cheesecake to cool gradually in the oven helps prevent cracks. Avoid sudden temperature changes.
- Flavor variations: Experiment with different extracts or add-ins, such as almond extract or chocolate chips, to customize your cheesecake.
Variationer
Philadelphia cheesecake is versatile and can be customized in various ways:
- Fruit-topped cheesecake: Add a layer of fresh fruit or fruit compote on top of the cheesecake before serving.
- Chocolate cheesecake: Incorporate melted chocolate into the filling for a rich chocolate flavor.
- Swirled cheesecake: Swirl in fruit purees or chocolate ganache into the batter before baking for a marbled effect.
- Glutenfri mulighed: Substitute graham cracker crumbs with gluten-free cookies or almond flour for the crust.
- Vegan cheesecake: Use vegan cream cheese and substitute eggs with flaxseed meal or silken tofu for a plant-based version.
Næringsindhold pr. portion
Her er en detaljeret oversigt over næringsindholdet pr. portion (baseret på 12 portioner):
- kcal: 350
- fedt: 25 g
- saturates: 15g
- kulhydrater: 30 g
- sukkerarter: 20 g
- fibre: 1 g
- protein: 6 g
- salt: 0.5g
Forslag til servering
Presenting your Philadelphia cheesecake beautifully can enhance the dining experience. Here are some serving suggestions:
- Pynt: Top with whipped cream, fresh berries, or a drizzle of chocolate or caramel sauce.
- Tilbehør: Serve with a side of fresh fruit or a scoop of vanilla ice cream for added indulgence.
- Beverage pairings: Pair with a glass of dessert wine, coffee, or a refreshing iced tea to complement the rich flavors of the cheesecake.
- Præsentation: Use a cake stand to elevate the cheesecake and add decorative touches like mint leaves or edible flowers for a stunning presentation.
Konklusion
Making a Philadelphia cheesecake is a rewarding culinary experience that results in a deliciously creamy dessert perfect for any occasion. With its rich history and delightful flavor, this cheesecake is sure to impress your family and friends. By following the detailed recipe and tips provided, you can create a cheesecake that rivals those found in bakeries. Don’t hesitate to experiment with variations and serving suggestions to make this classic dessert your own. Enjoy your baking adventure and the sweet rewards that come with it!


